Introduction to Raspberry Chocolate Chip Cream Bars
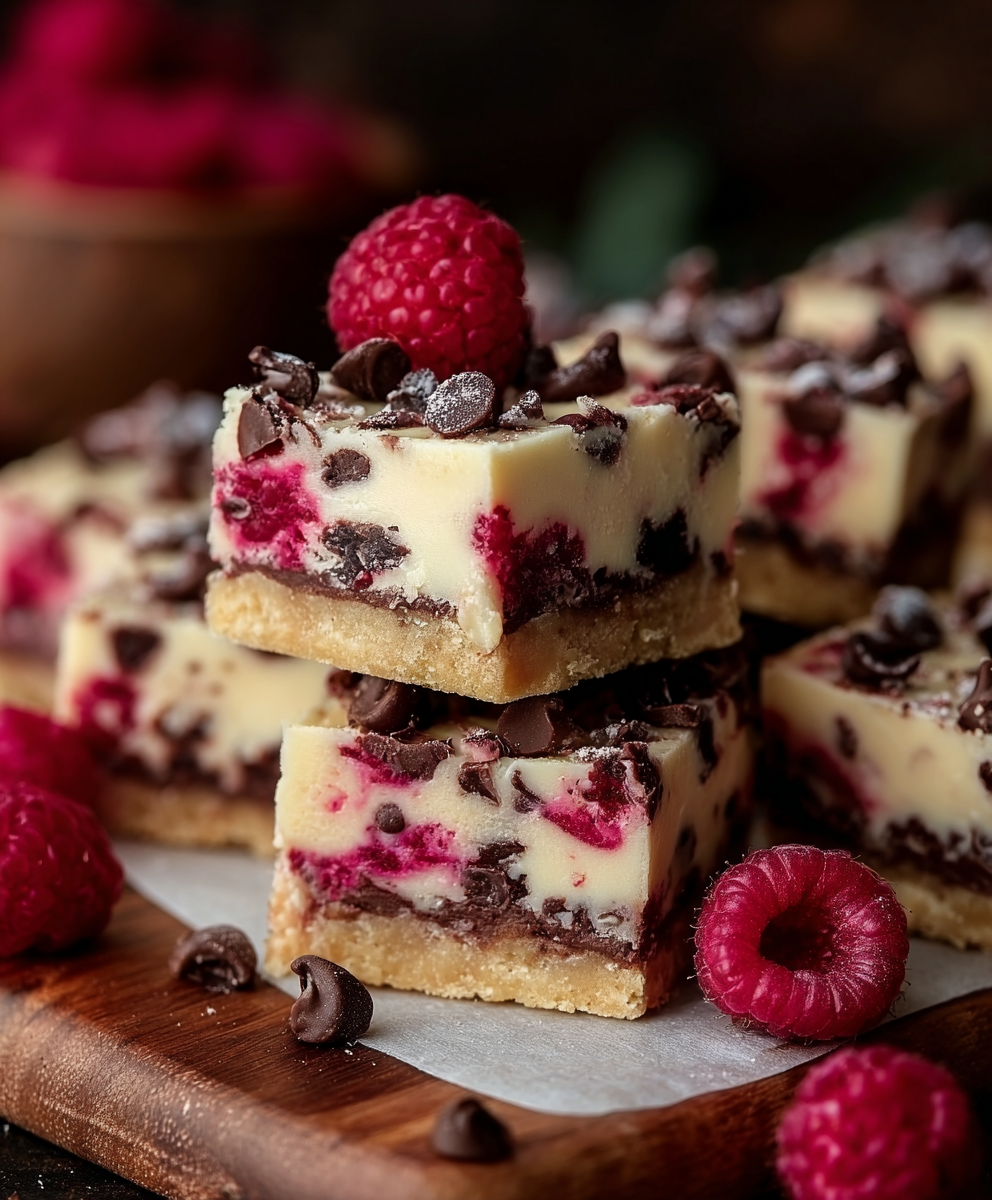
Welcome to the world of Raspberry Chocolate Chip Cream Bars, where every bite is a delightful journey! If you’re like me, you often find yourself juggling a busy schedule while craving something sweet. These bars are the perfect solution! They combine a buttery cookie crust, creamy cheesecake, and a tart raspberry filling, all topped with chocolate chips. Whether you’re looking to impress guests or simply treat yourself after a long day, this recipe is a delicious way to indulge. Trust me, once you try these bars, they’ll become a staple in your dessert repertoire!
Why You’ll Love This Raspberry Chocolate Chip Cream Bars
These Raspberry Chocolate Chip Cream Bars are a dream come true for any home cook! They’re incredibly easy to whip up, making them perfect for busy weeknights or last-minute gatherings. The combination of creamy cheesecake and tart raspberries creates a flavor explosion that’s simply irresistible. Plus, they look stunning on any dessert table, so you can impress your friends without breaking a sweat. Who wouldn’t love that?
Ingredients for Raspberry Chocolate Chip Cream Bars
Gathering the right ingredients is the first step to creating these delightful Raspberry Chocolate Chip Cream Bars. Here’s what you’ll need:
- Fresh or frozen raspberries: These little gems add a burst of tartness and vibrant color. Fresh is best when in season, but frozen works just as well!
- Cream cheese: This is the heart of the cheesecake layer, providing that rich, creamy texture we all love. Make sure it’s softened for easy mixing.
- Chocolate chips: A must-have for that sweet, melty goodness. I like to use semi-sweet, but feel free to experiment with dark or milk chocolate!
- All-purpose flour: This helps create the sturdy base for your bars. It’s the glue that holds everything together.
- Butter: Softened butter adds richness to the crust. It’s like a warm hug for your taste buds!
- Sugar: A little sweetness goes a long way. It balances the tartness of the raspberries beautifully.
- Egg: This binds the cheesecake layer, giving it that perfect creamy consistency.
- Vanilla extract: A splash of vanilla enhances the flavors, making everything taste even more delicious.
- Powdered sugar: Essential for the frosting, it gives that smooth, sweet finish to your bars.
- Raspberry puree or jam: This adds a lovely raspberry flavor to the frosting and can be swirled into the cheesecake layer for extra zing.
- Pink food coloring (optional): If you want to amp up the visual appeal, a drop of this can make your frosting pop!
For exact measurements, check the bottom of the article where you can find everything listed for easy printing. Happy baking!
How to Make Raspberry Chocolate Chip Cream Bars
Now that you have all your ingredients ready, let’s dive into the fun part: making these delightful Raspberry Chocolate Chip Cream Bars! Follow these simple steps, and you’ll be on your way to dessert bliss in no time.
Step 1: Make the Crust
Start by creaming together the softened butter and sugar in a mixing bowl until it’s light and fluffy. This step is crucial for a tender crust! Next, mix in the all-purpose flour and half a cup of chocolate chips until everything is combined. Press this mixture firmly into a parchment-lined baking dish. It should form a nice, even layer. Bake it for about 10 minutes, and let the aroma fill your kitchen!
Step 2: Prepare the Cheesecake Layer
In a separate bowl, beat the softened cream cheese until it’s smooth and creamy. Add in the egg and vanilla extract, mixing until everything is well combined. This is where the magic happens! Once it’s smooth, gently spread this luscious cheesecake mixture over the baked crust. Make sure it’s even, so every bite is a creamy delight!
Step 3: Add Raspberry Layer
Now comes the fun part! Spoon the raspberry puree or jam over the cheesecake layer. Use a knife or a skewer to gently swirl it into the cheesecake. This creates beautiful marbled patterns and adds that tart raspberry flavor we all love. Don’t be shy—get creative with your swirls!
Step 4: Bake
Pop the baking dish back into the oven and bake for 25 to 30 minutes. You’ll know it’s ready when the edges are set, but the center still has a slight jiggle. This ensures a creamy texture. Once done, take it out and let it cool completely on a wire rack. Patience is key here!
Step 5: Make the Frosting
While your bars are cooling, let’s whip up the frosting! In a mixing bowl, combine softened butter, powdered sugar, and a spoonful of raspberry puree. If you want that lovely pink hue, add a drop of food coloring. Beat everything together until it’s light and fluffy. This frosting is the cherry on top of your delicious bars!
Step 6: Frost & Decorate
Once your bars are completely cool, it’s time to frost them! Spread the creamy frosting evenly over the top. For an extra touch, sprinkle some chocolate chips and shavings on top. This not only adds flavor but also makes your Raspberry Chocolate Chip Cream Bars look stunning!
Step 7: Chill & Serve
Finally, refrigerate your bars for at least two hours before slicing. This helps them set perfectly and makes cutting easier. Once chilled, slice them into squares and get ready to enjoy a slice of heaven!
Tips for Success
- Always use softened cream cheese for a smooth cheesecake layer.
- Don’t skip the chilling step; it makes slicing easier and improves texture.
- Feel free to adjust the sweetness by adding more or less sugar to your frosting.
- For a fun twist, try adding a splash of lemon juice to the raspberry layer!
- Keep an eye on the baking time; ovens can vary, so check for that slight jiggle.
Equipment Needed
- Mixing bowls: A set of various sizes is handy. You can also use a large pot if needed.
- Electric mixer: This makes beating the cream cheese a breeze. A whisk works too, but it’ll take longer.
- Baking dish: A 9×9-inch square pan is perfect. If you don’t have one, a similar-sized dish will do.
- Parchment paper: This helps with easy removal. If you’re out, just grease the pan well.
- Spatula: A rubber spatula is great for spreading frosting evenly. A spoon can work in a pinch!
Variations
- Nutty Delight: Add chopped nuts like walnuts or pecans to the crust for an extra crunch.
- Gluten-Free Option: Substitute all-purpose flour with almond flour or a gluten-free blend for a gluten-free treat.
- Vegan Twist: Use vegan cream cheese and a flax egg instead of a regular egg for a plant-based version.
- Berry Medley: Mix in other berries like blueberries or strawberries for a colorful and flavorful twist.
- Chocolate Lovers: Incorporate cocoa powder into the crust for a chocolatey base that pairs beautifully with the raspberry.
Serving Suggestions
- Pair these Raspberry Chocolate Chip Cream Bars with a scoop of vanilla ice cream for a delightful contrast.
- Serve with a dollop of whipped cream and fresh raspberries on top for an elegant touch.
- Enjoy with a cup of herbal tea or a refreshing lemonade to balance the sweetness.
- For a stunning presentation, arrange bars on a decorative platter and garnish with mint leaves.
FAQs about Raspberry Chocolate Chip Cream Bars
Can I use frozen raspberries for these bars?
Absolutely! Frozen raspberries work just as well as fresh ones. Just make sure to thaw and drain them before using to avoid excess moisture in your bars.
How should I store Raspberry Chocolate Chip Cream Bars?
These bars can be stored in the refrigerator for up to a week. Just make sure to keep them in an airtight container to maintain their freshness!
Can I make these bars ahead of time?
Yes! You can prepare them a day in advance. Just remember to chill them for at least two hours before serving for the best texture.
What can I substitute for cream cheese?
If you’re looking for a dairy-free option, try using vegan cream cheese. It provides a similar creamy texture without the dairy!
Can I add more chocolate chips to the frosting?
Of course! Feel free to add more chocolate chips to the frosting for an extra chocolatey kick. It’s all about your personal taste!
Final Thoughts
Creating these Raspberry Chocolate Chip Cream Bars is more than just baking; it’s about crafting a moment of joy. Each layer tells a story, from the buttery crust to the creamy cheesecake and the vibrant raspberry swirls. I love how they bring smiles to my family’s faces, making any gathering feel special. Plus, they’re a breeze to make, even on the busiest days! So, whether you’re celebrating a special occasion or simply treating yourself, these bars are sure to bring a little bliss into your life. Trust me, you won’t be able to resist going back for seconds!
Print
Raspberry Chocolate Chip Cream Bars: Indulge in Bliss!
- Total Time: 1 hour 20 minutes (plus chilling)
- Yield: 12–16 bars
- Diet: Vegetarian
Description
A decadent dessert bar with layers of buttery cookie crust, creamy cheesecake, tart raspberry filling, and chocolate-studded pink frosting — pure raspberry-chocolate bliss.
Ingredients
- Fresh or frozen raspberries (1½ cups)
- Cream cheese (8 oz, softened)
- Chocolate chips (1 cup, divided)
- All-purpose flour (1 cup)
- Butter (½ cup, softened)
- Sugar (½ cup)
- Egg (1 large)
- Vanilla extract (1 tsp)
- Powdered sugar (1 cup, for frosting)
- Raspberry puree or jam (½ cup)
- Pink food coloring (optional)
Instructions
- Make the crust: Cream butter and sugar, then mix in flour and ½ cup chocolate chips. Press into a parchment-lined baking dish and bake for 10 minutes.
- Prepare cheesecake layer: Beat cream cheese, egg, and vanilla until smooth. Spread over the crust.
- Add raspberry layer: Spoon raspberry puree or jam over the cheesecake layer and gently swirl.
- Bake: Bake for 25–30 minutes until set. Cool completely.
- Make frosting: Whip together butter, powdered sugar, a spoon of raspberry puree, and a drop of pink coloring for a creamy topping.
- Frost & decorate: Spread frosting over cooled bars and sprinkle with chocolate chips and shavings.
- Chill & serve: Refrigerate for at least 2 hours before slicing into perfect squares.
Notes
- For best results, use fresh raspberries when in season.
- Adjust the amount of pink food coloring based on desired shade.
- These bars can be stored in the refrigerator for up to a week.
- Prep Time: 20 minutes
- Cook Time: 40 minutes
- Category: Dessert
- Method: Baking
- Cuisine: American
Nutrition
- Serving Size: 1 bar
- Calories: 250
- Sugar: 18g
- Sodium: 150mg
- Fat: 12g
- Saturated Fat: 7g
- Unsaturated Fat: 3g
- Trans Fat: 0g
- Carbohydrates: 32g
- Fiber: 1g
- Protein: 3g
- Cholesterol: 40mg


